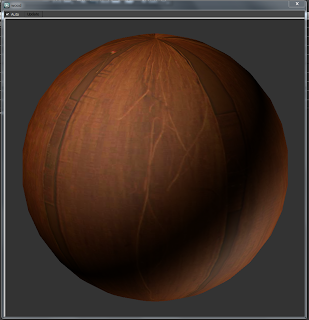
Today I made and attempt and modelling Da Vinci's Tank. To start with i created it by using three cones, one for the base, one for the centre and the final one for the top. I then made some cylinders to work as stilts for the viewing area. For the Cannons i made the main body using a cylinder and then used Proboolean with a smaller width but longer length cylinder to create the inside of the barrel. The Ridge on the end was made by lofting a circle and placing it on the end of the cylinder.
Once I pieced the parts together I added a wood texture to the three cones. I then attempted to rotate the texture on the main body of the Tank using a UVW map, however this caused the texture to bend due to the shape of a cone. With Richards help I was able to learn and use "Path Constraints" and "Shapshot Array" to create another body for the Tank. This technique allowed me to copy a object in the shape of a wooden plank around a circular path. I then edited the shape to be smaller width at the top and wider and the both. I then repeated the steps for the material again and I was able to get the planks aligned in the correct direction.
Tuesday, 7 February 2012
Materials
 Today we learnt how to use and create different materials. We first learnt how to you an image as a texture. To do this we saved a texture image from the Internet opened the material editor window and selected a default. Clicked on none by the diffuse colour and browsed to find the saved texture image under bitmap.
This then opened up and allowed us to edit the material. Next we used the Bump tool to add the texture again, this allowed us to add more texture and depth to the existing texture. This gave you texture more realism rather than being a flat colour.
 I then applied this knowledge to my Model of the Pantheon to give it a stone texture and with this i encountered a problem. due to some sides the texture was stretched or twisted. By learning how to use a UVW Map I was able to correct this problem.
Friday, 3 February 2012
Leonardo Da Vinci's inventions part 2
The "Aerial Screw" or Helicopter was yet another of Da Vinci's Flying Machines which was never built. His designs were very detailed and explained exactly how the device would operate. "If this instrument made with a screw be well made – that is to say,
made of linen of which the pores are stopped up with starch and be
turned swiftly, the said screw will make its spiral in the air and it
will rise high."
A personal favourite of mine is Da Vinci's Parachute. The Parachute was initially designed as a smaller version of the Flying Machine. It was designed with a triangular shape to hold an up draft and so that it could be folded and unfolded with ease. Again this invention was never built or tested in Da Vinci's time, but in 2000 a man named Adrian Nichols constructed a working prototype based exactly on Da Vinci's designs and it worked perfectly and "had a smoother ride than modern parachutes" according to A. Nichols.
Subscribe to:
Comments (Atom)


